

I've been wanting to make this tee for a long time and I finally diddd. Keep reading if you want to learn how I made it!
Things you will need:
- Heat and Bond paper (i found mine at Walmart) or you can use transfer on paper if you're going to print your image.
- Plain T-shirt
- Graphic image of your choice (mine are just images from a shirt)
- Pocket fabric of your choice
- Iron for the Heat and Bond (if yours need it)
- Scissors
- Thread and Needle

Soo, what I did first was cut out the image and then put it on the heat and bond paper and basically followed the instructions that told me how to use the adhesive paper.


 After doing that, I moved on to the pockets. I found a pocket template online and put my fabric on the screen and traced it on the wrong side of the fabric.
After cutting the pocket out, I folded down the edges and just sewed them down for a cleaner look.

After getting the image and pocket done, I put the shirt on and marked where the top of the pocket is going to sit. Since I wanted the flowers to stick up, I put the bottom of the flower stems on the line (shown below)


I ironed the image on and sewed the pocket down leaving the top open. This is how it looks like finished:

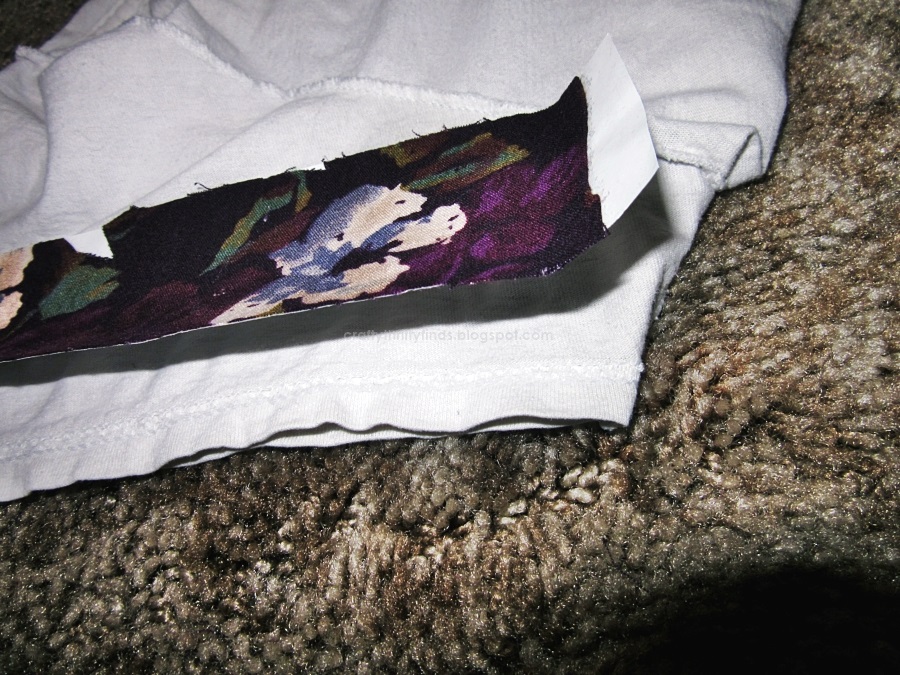
Moving on to the sleeves- I cut out two strips (one for each sleeve). The strip should be as long as the circumference of the sleeve and twice as wide as the width you want it to be.

I then used the adhesive paper to stick it to the sleeve.

Turning the shirt inside out, I ironed on the fabric to the INSIDE of the sleeve cover the seam line.

Finished on both sides:

Turn the shirt right side out and fold in the sleeves.


It should look something like this. Fold down the white part above the fabric and sew down for a cleaner look. After doing that to both sides, the shirt is finished!


Thank you checking my blog out!
No comments:
Post a Comment