
Summer's Coming!
It's been a while since I've done a proper tutorial, so I thought I'd make one!
I'm going to show you guys how to make your very own bralette. I've made a few of these before a couple of years ago, but since summer is coming and it's slowly getting hotter-ishh, a bralette is the perfect solution to hotter weather. The weather has been really bipolar, but it's obviously going to get a lot hotter soonn. Keep that in mind that there are a lot of ways you can tweek this tutorial around to make it fit your own style.


It's actually my first time trying out the lace with the bralettes and I looveee how lace looks on it. (:
Let's get started on the tutorial now!


Here is a close up of the elastics.
The pieces of fabrics are just scraps I found around the house and from old clothing that I didn't need anymore. You can work with one single piece of fabric or two. I chose two because the I didn't have enough pink fabric. These are both non-stretchy, and if you are going to use two pieces, make sure they are the same type. (ex. stretchy with stretchy or non-stretchy with non-stretchy)
You can get the pattern here.
Also, I got this tutorial from Lesley Converse on Youtube. You guys should go check her out and to clear any confusions with my tutorial. (:
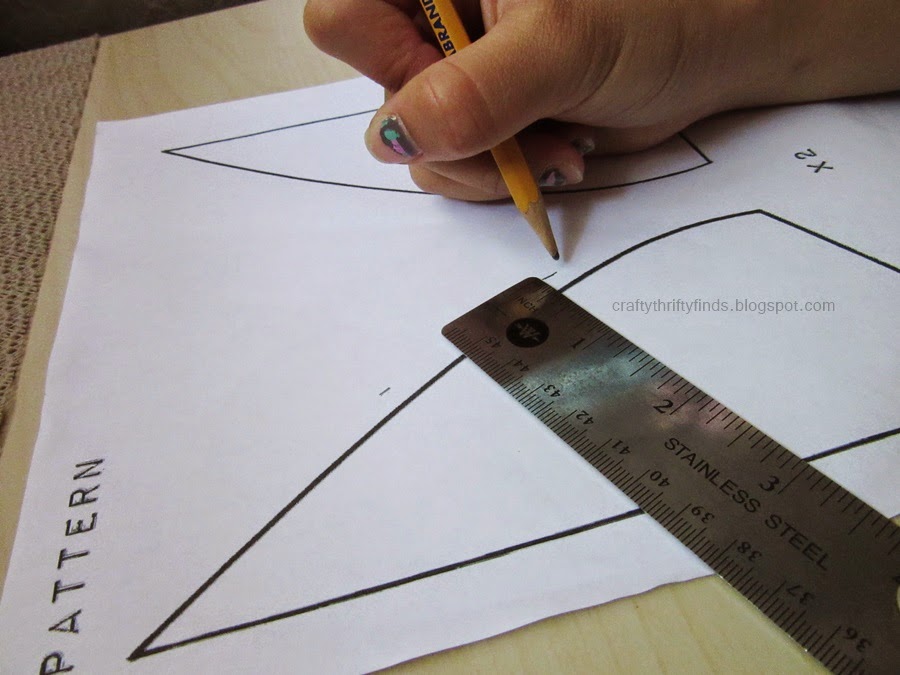
------------------- Starting with the pattern, you should mark in your seam allowance before cutting it out. I marked mine to be 1/4". After marking it in and cutting it out, you should get something like this:

Get your first fabric or your fabric and pin the two patterns on your fabric. I folded my fabric in half so I wouldn't have to cut the pattern out four times.


Again, I folded my fabric in half, and if you want to do that too, here is how it looks like.
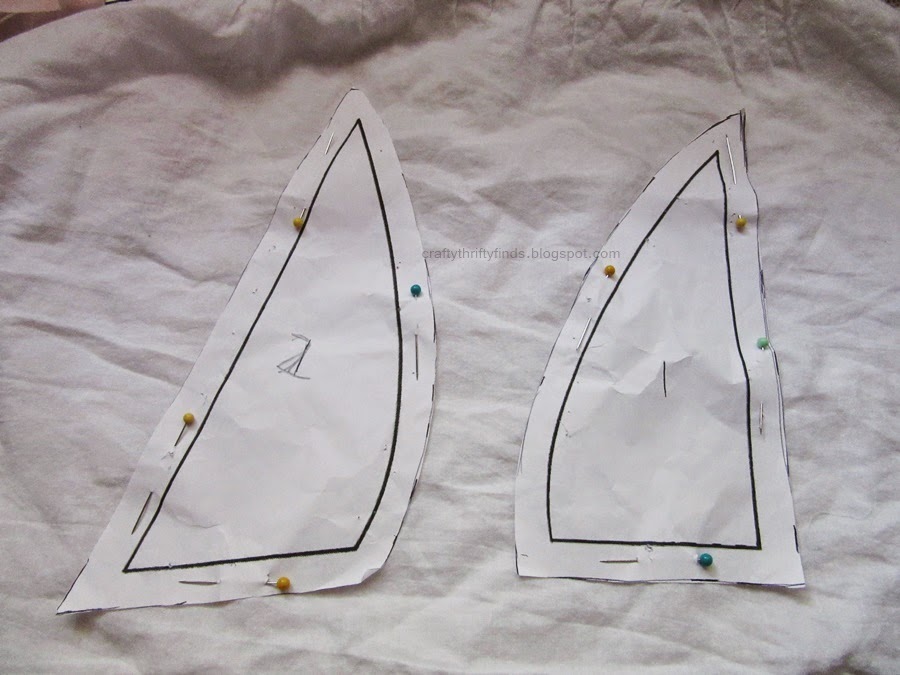
Cut the fabric out and you should get two pieces that look like this:


Picking up your second fabric or the same one, again repeat the steps. Pin and cut.

I also folded this one in half to get four pieces at once.
You should end up with four pieces of each pattern making the total eight.

It's time to sew the pieces together now!
Taking two pieces of the first fabric, make sure they are two different pieces as seen on the left.


Line the curves of the two pieces up and make sure that they are right sides together so when you sew it and flip it out, it doesn't show the stiches. Do that to the rest of the matching pieces. You should have four after doing so.
After doing that, sew along the curve on all of the four pieces.

I used a serger to sew the curves together.
If you don't have one, you can just straight stitch the curves together. It's going to look the same when it's flipped out.

After stitching all of the four pieces, it's time to make the straps!

To make the straps, grab the 3/8" elastic band and measure how long you want the strap to be from where your normal bra strap is and ends. You can measure your bra strap or your body. It's up to you.


Mine measured out to be 13" but I took off an inch because the elastic will stretch over time.

Taking the two straps, you sandwich it between two pieces of fabric (again right sides together).
I sandwiched it between the white and pink fabric.
Optional:
Cut off the tips of the triangle pieces to make it easier to sew the straps on.


This is how it looks like when you sandwich the elastics. Make sure to match the seams up together.
Below is a picture showing how it the two pieces look.

Sew along the dotted lings, make sure not to sew the bottom closed!
- I also used a serger to sew this part
Flip your bra cups inside out and sew down the bottom to close the cups.

Now that that's done, we have to do the waist band.
Taking your elastic band (preferably 3/4'-1") measure your waist or the waist of your bra. I also took an inch or two off the elastic so it wont be super lose after a few wears.


Example of how to measure your waist band is shown above.
Example of how the middle mark should look like to the left.

After marking the middle, line your bra cups to the elastic band and the middle. Make sure to try it on after pinning it around so that it's in the correct place.

After doing that, I pinned the shoulder straps to the waist band and sewed it down using my needle and thread.


I sewed the straps on using a cross stitch to add little delicate details to the bralette and a regular straight stitch to base of the bra cups.


You can leave your bra at this or add some more to it. An example is making a strappy back.
I decided to take it a step further and add a simple lace to it.


It seriously turned out really pretty, and I'm totally going to make more and more.
I encourage you to try it because it's a super easy bralette and you can use a lot of different types of fabrics to turn it into your own style.


Shirt: Marshalls / Brand: Pure Good
The lace adds a cute peek-a-boo to when you're wearing a low top or just a sheer shirt.


And you can't forget that yummy ice cream! This was a really fun project and short photo shoot (:
Enjoy!