Dresslink Review
Dresslink was kind enough to give me $20 to spent on clothes that I wanted to review. I tried to pick out some clothes that you guys would want to buy or check to see if it's good quality. I bought three items I will review on today.
So first, let's talk about shipping. I got my package paid on July 23, 2015 and shipped out on the 28th. It arrived on Aug. 11. It took three business days to process and ten days to ship out, which I think is pretty fast. The items came in a bag package and not a box package, but I didn't have any breakables so it was fine. The package looks like this:


It was nice that the clothes came individually packaged.
1- "Plants are Friends" Tee
I did fold the t-shirt in the picture above, but the graphic on there is actually good quality. One thing that surprised me was how the t-shirt was designed. I bought it thinking was going to be loose-fitting and jersey material, but it came in small and scratchy material. Plus, it does not look like the picture on the website. I think it's still a pretty good tee, I don't like wearing tight fitting clothes though, so that's the only reason why I don't really like it.
Other then the snug fit, scratchy material and the fact that it did not look like the picture on the site, it's a pretty good t-shirt if you don't compare it to the picture.
I got this shirt in a one-size and it's pretty snug on me. I wouldn't recommend getting it if you are a size M or larger.
Price: $3.10
Size: one-size
--You can check the original tee out on the site
here.
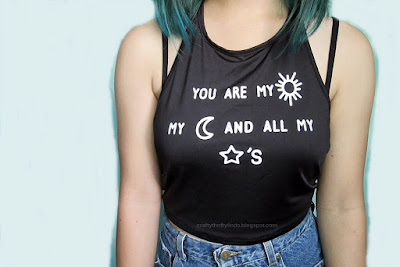
2- Halter Top
On it, it says, "You are my sun, my moon, and all my stars"
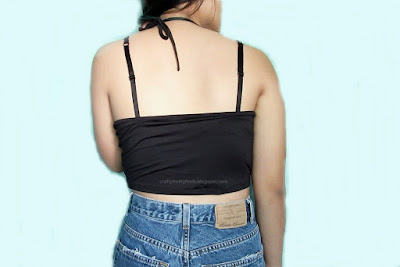
The material is very stretchy. In fact, I think it might be tooooo stretchy. Once it stretches, it stays stretched and it sucks because it'll be all loose on you. However, I do think this was one of the best items out of the three that I got.
I like this piece a lot, but I would get a size small next time I buy a stretchy halter from Dresslink. If you are a s/m or a m I would suggest a small. I had my sister (who is a size M) try it and it fits loose too. However, if you have a larger chest but is a s/m, I would suggest M because there won't be enough chest coverage.
Price: $3.91
Size: Medium
If you want one, feel free to order yourself one
here.
3- Tennis Skirt
There were a few loose threads, but nothing that would tear the skirt apart. Again, (I think this is for all the buttons from Dresslink( but the button was loose. You can see from the picture that it was only looped through two hole and not all four. So I would probably go in a sew that in tighter.
When I got it, it was in good condition and everything. The zipper worked and the button was on it, but when I wore it, the zipper broke. My hip bones were too big. ): But I can easily replace the zipper, so that's no problem. I am kind of disappointed that it broke, but if you sew, it'll be an easy replace.
Honestly, this is a good dupe for the AA tennis skirts--minus the broken zipper.
The length is perfect and it's not see-through.
You can see that the zipper broke on the left, but I'll just replace it.
It was kind of tight around the waist, but not uncomfortable tight.
I would recommend a M if you are a s/m If you are a small, just go with a small.
Size: S
Price: $5.99
If you would like to check it out and the extra reviews out, click
here.
These were the three items that I chose to review for you guys, and I would appreciate it if you check the items out! If you guys have any questions about the items above, just drop down your questions below and I'll answer them for you! Thank you.


