Monday, August 10, 2015

Back to School Decor Ideas

Back to School Décor Ideas

 
School is slowly closing in on us! Some of us has already started school already. I'm here today with some ideas on how to decorate your school binders and notebooks to motivate yourself to do well in school! I know that for me, I find it easier to enjoy school if I decorate my school materials to my liking. The first ideas that I will be showing you are these binder decors that are super easy and cute to do.
 
  • This first one is this yellow binder. I decided to change my normal color picks so I picked up this mustard colored binder. On the front cover, I just simply inserted a drawing I drew over summer. If you don't draw or anything like that, you can just print out a nice picture of your liking and insert it there. I don't like to label my binders just because it makes it more like a job to open my binder up because it just makes it feel too school-like.


- To make the divider, I just grabbed some cardstock paper and stickers and put it all together. So, using some black construction paper, I sketched out "math" on a white cardstock, cut it out, and basically just glued it onto the black construction paper. I added some cute stickers to spice it up and just glued it to the big colored cardstock paper. I then added some tape around the divider sign to insure that it won't rip because it hangs outside the binder folds.

 The next one is this purple binder. There really isn't much to it. I just stuck a star-covered blue paper in the front and left it at that. You can design it if you want but I prefer it blank.


Lastly, a magazine covered notebook!
- To do this, you just need a notebook of your choice (I got a notebook without spirals because I don't really like them) and magazines. If you don't have magazines, you can just print out some pictures. You also need something to glue the pictures onto the cover. This is optional, but ModPodge can be used as the top layer to make everything stick.
 

  • Okay, so first of all, you need to lay out your pictures you chose. Here is how I laid mine out. As you can see, I stuck with a black and white theme. 
  •  This step isn't necessary if your notebook has no holes or you don't really need the holes. I wanted holes in my notebook so I could put it in my binder so to do this, take the pictures that cover up the holes and basically just mark where the holes are.


  • I recommend using a single hole puncher, but this works as well. (I couldn't find my single hole puncher so I had to use the 3-ring one)
  • When you finish, you should have something like this. Simply glue it onto the cover and if you have ModPodge, apply a layer on the top to make sure it lasts you the school year. (I couldn't find my ModPodge so it's not in the pictures.)
 
These are all my ideas on binders and notebooks! You can switch it up and be creative with it! These are simple ideas, but it can really help you be more motivated during school. I wish the best for you all in school!


Sunday, August 2, 2015

Wall Decor

Something New for Motivation!

 Hellooooooo thereee! I haven't had any time to do any thrifting revamps, but I did get to decorate my empty wall! (i still have to decorate my bed wall) Since school is almost here, I needed some motivation to get back into the school vibe, so I decorated my wall! I'll post a bed wall decor and maybe some DIY's asap after I actually decorate it.


I have the worst lightning in my room, so I had to make it up with a filter! 
The backboard is just made of card-stock that I taped together. It's super easy! Then I just painted the edges blue and taped (I couldn't find my glue gun) lace around the borders. 


What's better then a homemade calendar?? I find it way easier to make my own calendars than trying to find one that I like at the store. This way I can just decorate to my liking! I used post-its to put the numbers of the month on the calendar and the rest was just was card-stock and markers! Hanging to the left is my owl lanyard.


Just a little bit of pictures to style it up! I hung the pictures on a string and held it up with clothespin. And if you're curious, the pictures are of me and my boyfriend like, two years ago. 
Hanging on one of the clothespin is my one and only necklace I actually wear. I got it from Psithuria. I believe they are closed for summer though. 
Next to my pictures is a whiteboard! This is just to put any reminders and write quotes and whatnot on it. It fills up the empty space pretty well too!


Below all that is just my books and post-its annddd succulents. I'm in the process of doing the Mess book by Keri Smith. 

Lastly, my succulents. I still have to re-pot them because they're growing and need more space, but I haven't found any pots to re-pot them in yet. I got these at the Chico farmers market. They just add a nice touch of nature to my plain room. 


That ends my wall decor and thanks for reading! I hope you all have a great day(: 


Friday, June 5, 2015

OOTW | Finals Week

Last Week of School!


SUMMER IS FINALLY HERE!!!! For the last day of school, I decided to do an OOTW and I have it uploaded on Youtube here. Check it out and I hope you guys have a great summer! I will be inactive this summer due to a program I am taking so I hope you guys stay tune to the next time I update! (:


I love you guys!


Sunday, May 17, 2015

DIY Bralette

Summer's Coming!

It's been a while since I've done a proper tutorial, so I thought I'd make one!
I'm going to show you guys how to make your very own bralette. I've made a few of these before a couple of years ago, but since summer is coming and it's slowly getting hotter-ishh, a bralette is the perfect solution to hotter weather. The weather has been really bipolar, but it's obviously going to get a lot hotter soonn. Keep that in mind that there are a lot of ways you can tweek this tutorial around to make it fit your own style.

It's actually my first time trying out the lace with the bralettes and I looveee how lace looks on it. (:
Let's get started on the tutorial now!
 Materials: A bralette pattern, elastic bands of your choice (I have a 3/8' and 3/4" elastics), a good fabric to work with.

Here is a close up of the elastics.
The pieces of fabrics are just scraps I found around the house and from old clothing that I didn't need anymore. You can work with one single piece of fabric or two. I chose two because the I didn't have enough pink fabric. These are both non-stretchy, and if you are going to use two pieces, make sure they are the same type. (ex. stretchy with stretchy or non-stretchy with non-stretchy)
You can get the pattern here.
Also, I got this tutorial from Lesley Converse on Youtube. You guys should go check her out and to clear any confusions with my tutorial. (:
         
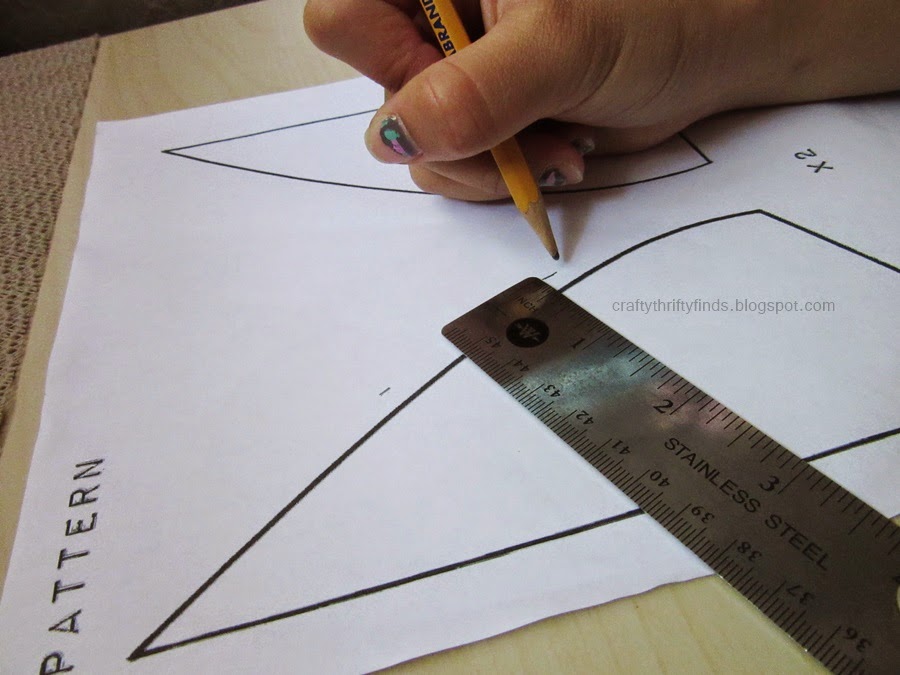
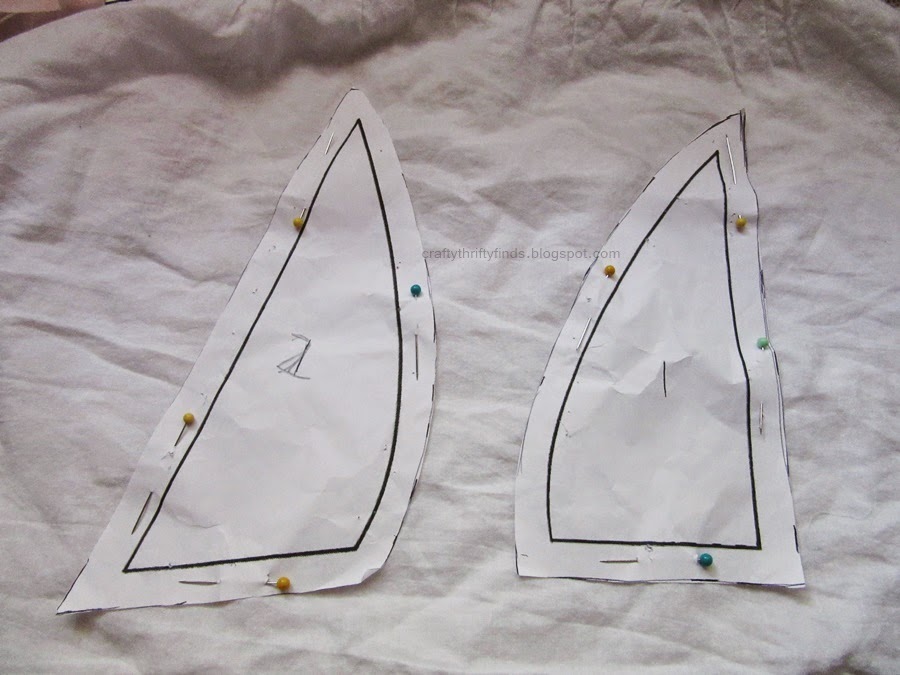
 -------------------     Starting with the pattern, you should mark in your seam allowance before cutting it out. I marked mine to be 1/4". After marking it in  and cutting it out, you should get something like this:
Get your first fabric or your fabric and pin the two patterns on your fabric. I folded my fabric in half so I wouldn't have to cut the pattern out four times.
Again, I folded my fabric in half, and if you want to do that too, here is how it looks like.
 Cut the fabric out and you should get two pieces that look like this:

 Picking up your second fabric or the same one, again repeat the steps. Pin and cut.
 
 
 I also folded this one in half to get four pieces at once.
You should end up with four pieces of each pattern making the total eight.
It's time to sew the pieces together now!
Taking two pieces of the first fabric, make sure they are two different pieces as seen on the left.
Line the curves of the two pieces up and make sure that they are right sides together so when you sew it and flip it out, it doesn't show the stiches. Do that to the rest of the matching pieces. You should have four after doing so.
After doing that, sew along the curve on all of the four pieces.
 
I used a serger to sew the curves together.
If you don't  have one, you can just straight stitch the curves together. It's going to look the same when it's flipped out.
After stitching all of the four pieces, it's time to make the straps!
To make the straps, grab the 3/8" elastic band and measure how long you want the strap to be from where your normal bra strap is and ends. You can measure your bra strap or your body. It's up to you.


Mine measured out to be 13" but I took off an inch because the elastic will stretch over time.


Taking the two straps, you sandwich it between two pieces of fabric (again right sides together).
I sandwiched it between the white and pink fabric.
Optional:
Cut off the tips of the triangle pieces to make it easier to sew the straps on.


This is how it looks like when you sandwich the elastics. Make sure to match the seams up together.

Below is a picture showing how it the two pieces look.

 Sew along the dotted lings, make sure not to sew the bottom closed!
  •  I also used a serger to sew this part
Flip your bra cups inside out and sew down the bottom to close the cups.
 Now that that's done, we have to do the waist band.
Taking your elastic band (preferably 3/4'-1") measure your waist or the waist of your bra. I also took an inch or two off the elastic so it wont be super lose after a few wears.
 After cutting the elastic to your size, fold it in half and mark the middle. This is so you can put your bra cups in the correct place.


Example of how to measure your waist band is shown above.

Example of how the middle mark should look like to the left.


 After marking the middle, line your bra cups to the elastic band and the middle. Make sure to try it on after pinning it around so that it's in the correct place.


Using a needle and thread (I was too lazy to get out my regular sewing machine because I stored it away) I sewed down the bra cups.


After doing that, I pinned the shoulder straps to the waist band and sewed it down using my needle and thread.

 
 I sewed the straps on using a cross stitch to add little delicate details to the bralette and a regular straight stitch to base of the bra cups.


 You can leave your bra at this or add some more to it. An example is making a strappy back.
I decided to take it a step further and add a simple lace to it.


It seriously turned out really pretty, and I'm totally going to make more and more.
I encourage you to try it because it's a super easy bralette and you can use a lot of different types of fabrics to turn it into your own style.


Shirt: Marshalls / Brand: Pure Good
The lace adds a cute peek-a-boo to when you're wearing a low top or just a sheer shirt.


And you can't forget that yummy ice cream! This was a really fun project and short photo shoot (:
Enjoy!